Before an application can run, it must have at least one environment created for it. An environment defines the agents used by the application, among other things.
-
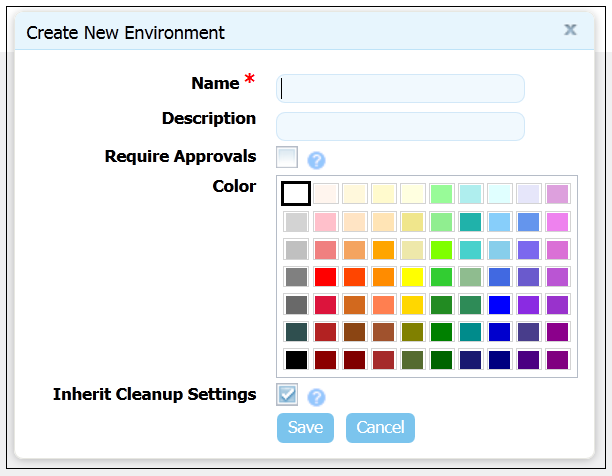
Display the Create New Environment dialog (
Home > Applications > helloWorld_application > Create New Environment). -
Use the Create New Environment dialog to define the environment:
-
The value in the Name field will be used in the deployment.
-
If you check the Require Approvals check box, approvals will be enforced. See Deployments for information about the approval process. This is our first deployment so an uncontrolled environment will do fine--leave the box unchecked.
-
Selecting a color provides a visual identifier for the environment in the UI. Typically, each environment will be assigned its own color.
-
Leave the Inherit Cleanup Settings check box checked. Clean-up refers to archiving component versions. When a component is archived, its artifacts are combined into a ZIP file and saved. The corresponding component is removed form CodeStation. When checked, settings are inherited from the system settings, otherwise they are inherited from the application's components, see the section called “System Settings”.
-
-
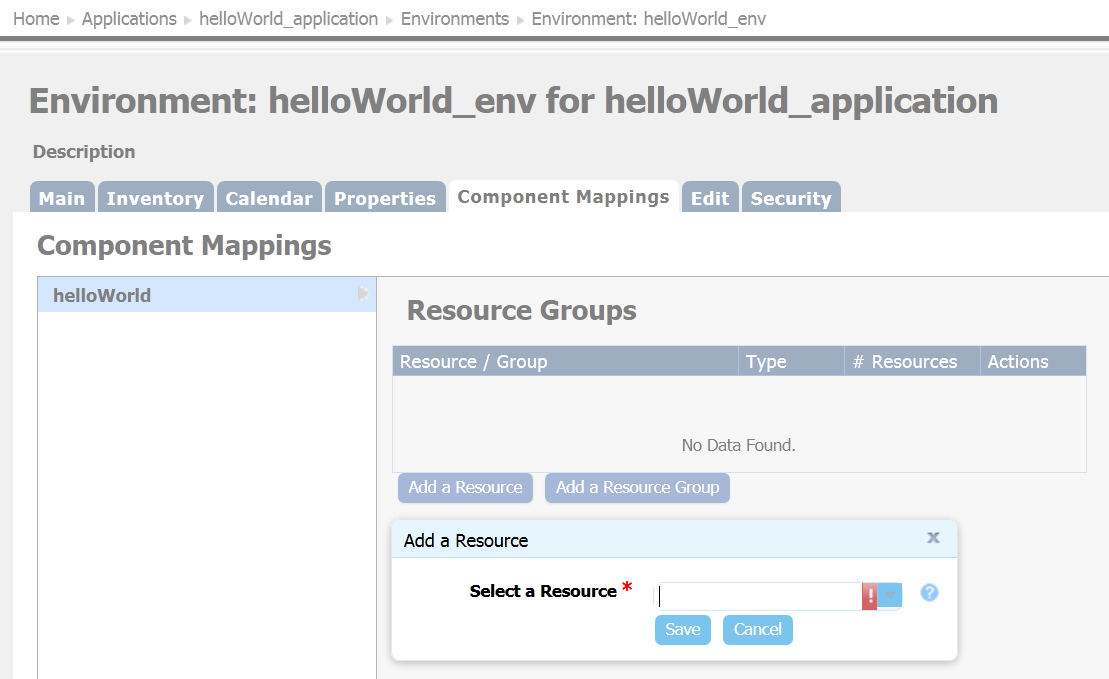
Next, add an agent that will execute the application's process steps. Display the Add a Resource dialog (
Applications > helloWorld_application > Environments > Environment: name > Component Mappings > Add a Resource).Select any of the agents that were created when uDeploy was installed.
While our example uses only a single resource, deployments can use many resources and resource groups. Resource groups provide a way to combine resources, which can be useful when multiple deployments use overlapping resources. See Resources for information about resource groups.